Celotex used to insulate the walls, camping mat for the floor and the ceiling was fitted with silver backed floor insulation from B&Q. Panels and ceiling are now covered in flash taping to reduce drumming.
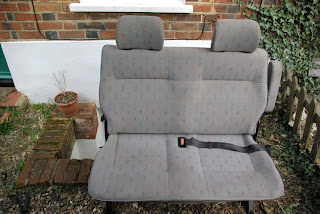
Rear Seats
SAAB Seats Below
So the ply lining fitting began and I only got a few picks of this and the insulation, but you will get the idea. The flash taping is applied directly to the panels and then the Celotex filled the gaps between the panel and the ply lining. We decided to cut the ply to fit to the depressions in the pillars and will carpet about 2 cm under the ply panels to get the joints as seemless. As we are not running lots of cables for a split charger or anything like that we decided on keeping it all snug to the panels.
Team fitting first bit of ply, note no insulation or flash taping behind. The flash taping came a bit later after driving the van for a while with the insulation, ply lining and ply carpeted.
 This one simply shows the Celotex in place in the panel depressions, where I could I have doubled the Celotex up for extra insulation. I recommend Kingspan or Celotex as they are the same product and very easy to work with. You'll note that the floor is the stock colour here, we did use the same insulation for the floor as we did for the ceiling. But this has been changed to camping mats as a litre of water was spilt in the back and worked its way in to the spaces between the bubbles and wouldn't come out. It did improve the warmth though, the mats prove as effective and will cope better with spills.
Above is the floor fitted and the bed base/storage box taking shape. You'll see the seat is fitted and folds flat. The box with lid is built to this height and a made to measure bouldering mat was purchased for the mattress and bouldering. I'll supply some more up to date pics that show how this fits together and works soon. Here's another pre carpeting of the box.
Finally, below is a picture of the 17' alloys that are now fitted. Woohoo! These have actually improved the handling quite a bit and the ride quality as predicted.
These are van rated from Autec and came in a pretty damn good price with appropriate Kuhmo tyres and look pretty good fitted I think, see below.
More to come.


